Adding Email Notifications
To add an email alert you will need to know the addresses you want alerts sent to, the outbound SMTP server that allows the Sandfly server to send email, and login information.

Adding an Email Notification
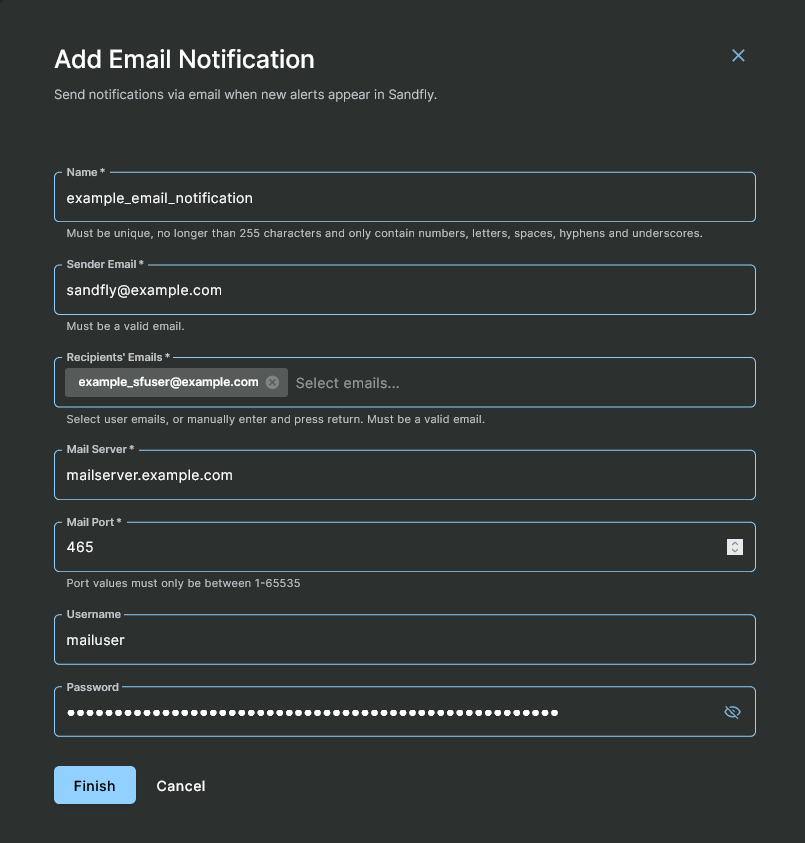
Setting up an email notification is easy, fill in the following fields:
- Name - A readable name for your reference of the email alert group.
- Sender Email - What email address should the Sandfly server use as the sender? This normally should be the same domain that is linked to the user login otherwise the SMTP server will likely reject it as invalid.
- Recipients' Emails - A list of email addresses to receive the alerts. This is a simple list and you can put in a mailing list instead of individual addresses if you have a group meant to receive alerts.
- Mail Server - The outbound SMTP address that will be connected to to send mail.
- Mail Port - Default port to use to send email. You do not need to change this unless there is a special reason.
- Username (optional) - The username Sandfly will use to login to the SMTP server to send email.
- Password (optional) - The password Sandfly will use to login to the SMTP server to send email.
Once all of the necessary fields have been completed, click on the Finish button. Sandfly will encrypt your email credentials and add the notification.
TIP: Test the Email Configuration
We recommend sending a test email from Sandfly to confirm the configuration. This can be swiftly accomplished by clicking on the Test button found under the Actions column of the Notifications page. Afterward, check that the recipient(s) received the test email.
Updated 3 months ago
